Accessories, Other
(Yashica branded and other historically interesting and/or useful photographic accessories)
Contents
(Scroll down or click on links)
Other Yashica Branded Accessories
Yashica Sailor Boy & Other Stuff
Yashica Cigarette Lighter & Ashtrays
Pocket Knife
Yashica Watches
Clothing Patch
Yashica Transistor Radio & Phonograph
Yashica Binoculars
Yashica Made “Sterilair” Air Steriliser
Accessories (Non-Yashica)
Arca-Swiss Compatible Tripod Plate
Filters & Hoods
Alternative Lens Caps
3D Printed Lens Hoods and Caps
Minolta Autocord Autopole
Rollei Panorama Head
Rolleinar Close-up Lenses
Yashica 44LM Neck Strap by Jessop's
Other Yashica Branded Accessories
There are Yashica branded exposure meters, flashguns and tripods. Whether any models of these were specifically designed with the TLRs in mind, I do not know but the evidence suggests otherwise. By the time the 1960's rolled around, the focus was firmly on the 35 mm market but obviously, you could use whatever accessories you wanted, providing that they were suitable for the purpose.
Exposure Meters
The exposure meter description below left is from a Yashica US full range brochure originating from about 1959.

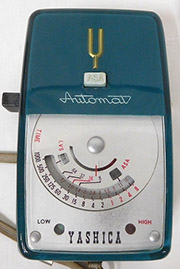
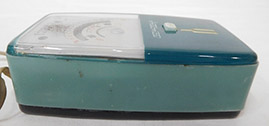
(Images 2 and 3 detail from larger web images)
The two tone green casing seems to be a match for the flash unit further down. There is also a different Automat model:
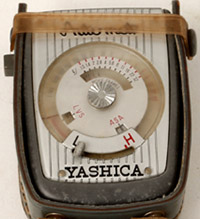 (Detail from larger web image)
I have no idea which came first but I believe that both are earlier types than the ones below, all of which have “YEM-” product identifiers. The accessories page from the circa 1968 brochure in the Tripod section below shows the following meters together in a group (although the YEM-31 and 35 in the brochure are the later “Super” variants) so at some point in the late 1960s, a version of all of them was available at the same time. The basic version of the YEM-35 meter appears in a 1962 catalogue with flashguns - see Flashguns section below.
Two views of YEM-15 clip-on meter with selenium cell:
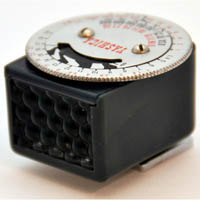
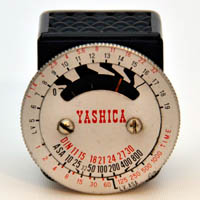
(Images courtesy of Göran Årelind)
In his collection, Simon A. Spaans has identical clip-on meters with the names “Unittic”, “Fodor” (Netherlands importer of photographic equipment), “Plus Meter”, as well as “Yashica”
The handheld Yashica meter with selenium cell on the left below is the model YEM-31. Simon has a similar meter with the name “Unittic”. This is also commonly found with the name “Sunset Unittic Model 31”. The manufacturer is Showa Koden Co., Ltd. A copy of the manual is available from Orphan Cameras.
.jpg)
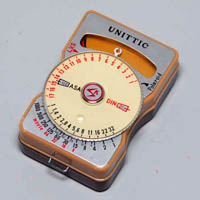
(Left image courtesy of Göran Årelind, right image courtesy of Simon A. Spaans)
The YEM-35 is a clip on CdS type but it can also be conveniently hand held. The foot slides into a metal clip in the leather case so that the case can be opened to use the meter without fear of the meter falling out. In operation, the meter is pointed at the subject and the meter is turned on to take the reading. Turning it off locks the reading. Note that the small “Y” logo in the middle of the dial (similar to the YEM-31 and 55) is missing on this particular example.
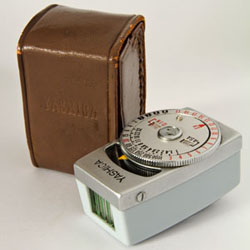
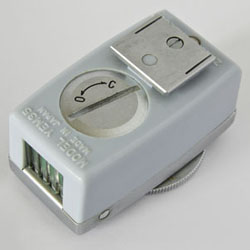
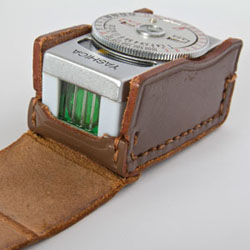
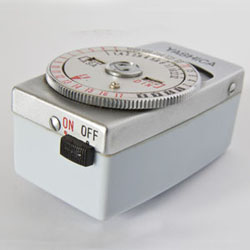
As noted earlier, both the YEM-31 and YEM-35 are also found with the suffix “Super”. These are updated versions.
The exposure meter below is a larger handheld CdS type, model YEM-55.
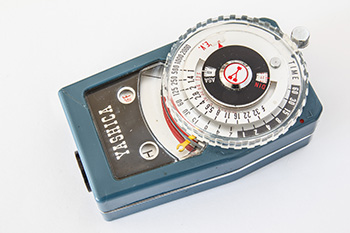
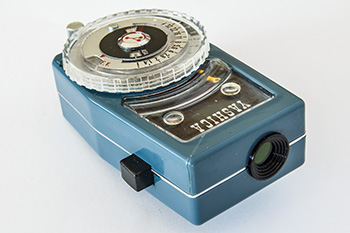
The December 1964 issue of Popular Mechanics noted:
“YEM-55 Exposure Meter uses a highly sensitive CdS cell. Clearly printed scales read from ASA 3 to 12,000 at exposures of 60 sec. to 1/2000 and apertures of F:1 to F:32. On-off switch minimizes battery drain. We tried this meter and found it rivals others costing almost twice as much. Retails for under $25, with mercury battery, cord and leather case. Yashica, 50-17 Queens Blvd., Woodside 77, N.Y.”
Flashguns
The history of bulb type and early electronic flashguns is also covered in “Accessories Identified in User Manuals etc” together with further examples. Initially, the items appearing in Yashica user manuals were unlikely to be Yashica made or branded. By the end of the 1950s, beginning of the 1960s, bulb flash units with folding reflectors began appearing with Yashica branding and the word “Lite” in the name and electronic flashguns adopted “Quick-Lite”.
Below are a number of views of a Yashica bulb flashgun which I believe is a Yashica Lite II:
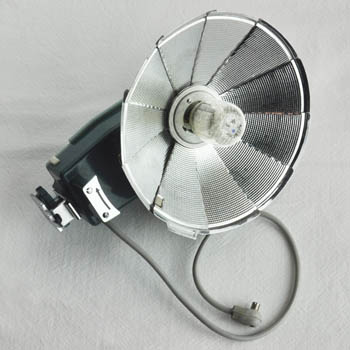
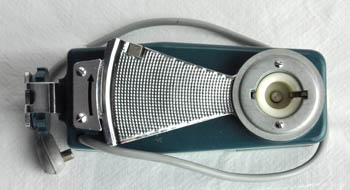
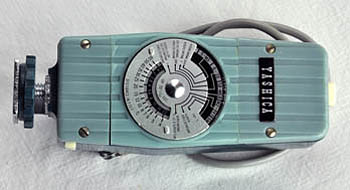
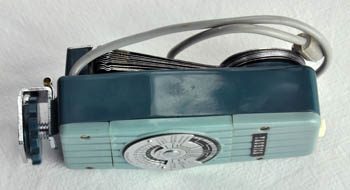
(Images courtesy of Göran Årelind)
This flash has a test button but no pilot lamp. Possibly, the flash was suppled with a test lamp to be used instead of a flashbulb. According to Göran:
“This one has a 15 Volt battery, V74PX. The bulbs are normally the M2 or M3 size or you
can use a adaptor (I think Ba15) to Philips PF bulbs, or any other bulb with Ba15 socket.
In that aspect it's very clever - a "multiple" socket makes the choices of
bulbs rather wide. The following bulbs are printed on the exposure scale (back of the unit) "5 - M5", "6 - 26", "5B - M5B", "M2 - PF1" & "SM - SF".”
I have found at least four other bulb types with folding reflectors (plus at least two later ones with fixed reflectors, “AG Flash Gun” and “AG-D”, the second and probably both with “Yashica-Lite” as part of their full names - see “1965-1970” in “Accessories Identified in User Manuals etc”). The folding reflector types have similar features but the bodies are quite different and each has their own pouch. The above type, probably the oldest of the five found but presumably, there is also a Yashica Lite I, was supplied with a dedicated “Yashica” branded, heavy leather pouch stitched similar to the TLR ever-ready cases and with a fold over flap with press stud fastener. The name on the front is in gold lettering in the heavy block style that Yashica adopted in the late 1950s. The leather is an unusual colour in that it does not match any known TLR ever-ready cases; it is a light, pink/beige/cream sort of colour, and therefore the flash is unlikely to have been specifically intended for TLRs.
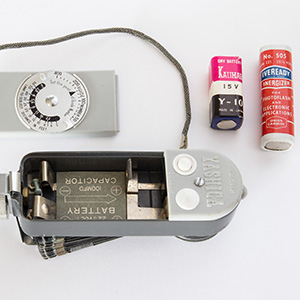
Several Yashica 44As have been found with a rather slim, altogether more svelte bodied unit with very rounded top, dark grey main body and a light grey panel on the back. The name is moulded into the back. These ones have both a test button and pilot light:
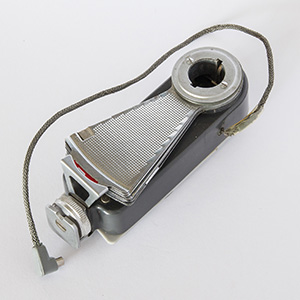
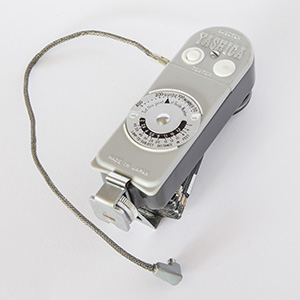
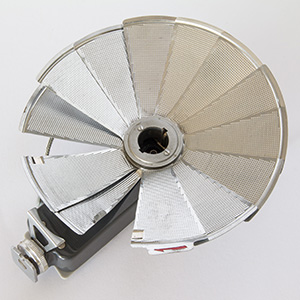
This particular example has some issues. The plastic covering of the lead is apparently biodegradable and the atoms have returned to whence they came, leaving only the metal braid. This seems to be a common problem affecting 100% of examples found but most have some small part of the covering remaining. The bigger problem is that one of the joining straps on the back of the reflector is missing.
Unlike the Yashica Lite II, it only takes bayonet bulbs but there are elements of its construction which make me think that there could be a connection between the two, e.g. the metal plate around the bulb socket, detailing of the calculator dial on the back and the solid plastic construction.
The examples found on the net have similar style leather pouches to that described for the Yashica Lite II but this time, the colour is blue-grey and a good match for the cameras' ever-ready cases:
 (Image courtesy of Chris Whelan)
Perhaps intended as a dedicated Yashica 44A accessory, or it may have been simply designed with that model in mind, it was available as a boxed gift kit with the 44A which also included the accessory hand grip:
 (Document image courtesy of Chris Whelan)
The ad is from the May 1960 edition of Modern Photography. I have seen only two surviving boxes, one with a complete set of contents, in the other the flash had been replaced by another brand. However, I have found several cameras for sale without their boxes but with the rest of the kit intact. The complete kit:
 (Detail from larger web image)
I am not quite sure where the “Yashica-Lite BC-I” unit it fits in, although it may be the conventional companion to the “Yashica-Lite Dynamo-I” in the 1962 catalogue further below. “BC” I assume stands for “battery-capacitor”. It has an offset foot which twists around from the usual position on such flashguns to a side mount suitable for TLRs (image below shows the foot in the halfway position). It is also fitted with a clever bulb adaptor - when swung into the up position, the flashgun takes inexpensive AG-1 capless bulbs and when swung out of the way inside the unit, bayonet bulbs can be used.
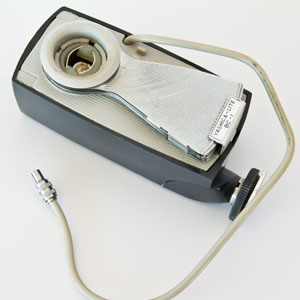
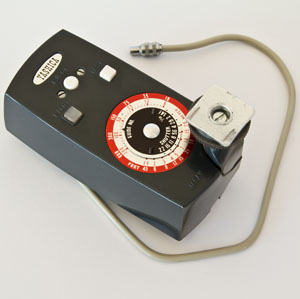
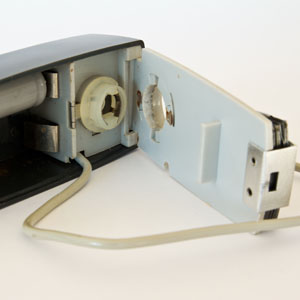
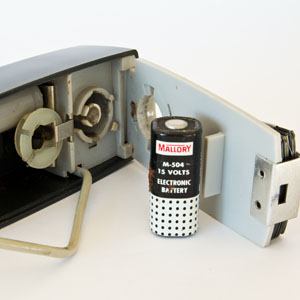
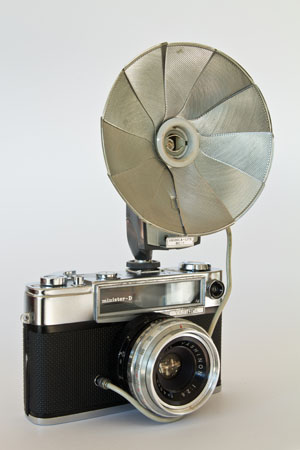
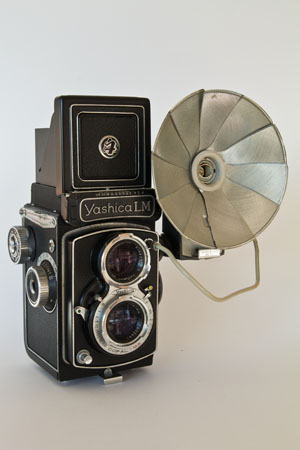
The lower images show the flash fitted to a Yashica Minister D with the foot in the conventional position and with the foot swung to the side for fitting to a Yashica TLR. Its among the most TLR friendly folding flashguns I have come across.
(I suspect that the flashgun above is related to the “West Hyper Flash Gun Model BII”/“National Hyper Flash Gun Model BII”, but without the pivoting foot, and that the flashgun below is related to the “West Hyper D”/“National Hyper D”. They share button placements and styles, similar calculator dial styles and in fact the orange plastic wheels on the two Hyper D models and Yashica below are identical as is the pattern of the metal plate under it. “West” is West Electric Co., Ltd. which was based in Osaka, Japan and “National” is today's Panasonic Corporation. The relationship between the two is explored a little further on the Nicca's Flashgun Origins page.)
The last type of folding reflector flashgun that I have seen has a dark grey body and light grey front panel on the front. It is not dissimilar to the BC-I and maybe a later development with many similar construction elements. It loses the side-mounted pivoting foot with screw adjuster and has a simple, central, mainly plastic spring loaded foot and a thin, cheap plastic pouch similar to those supplied with hundreds of other flash units in the early 1960s. The front panel pivots up the same way as on the BC-I and it has an almost identical bulb adaptor. However, the body is more rectangular in shape with a raised, orange plastic rimmed wheel under the exposure calculator dial which I assume operates the dynamo just as it does on the similar West and National Hyper D. In that context, I assume that it is the “Yashica-Lite Dynamo-I” in the 1962 catalogue below.
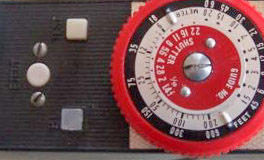 (Detail from larger web image)
Below is an ad for what may be the original “Yashica Quick-Lite” electronic flash showing it attached to a Yashica 44A:
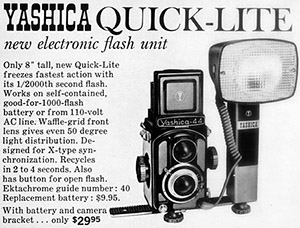 (Detail from larger web image)
Note the spelling in the version below. This is from what is probably a late 1959 brochure featuring the about to be released/just released Yashica Mat-LM and Yashica 44LM. Why pair a relatively expensive flashgun with a budget camera that costs the same?

(Scan courtesy of Chris Whelan)
Below are some flashguns from a catalogue issued by Australian Yashica importer Swift & Bleakley Pty. Ltd. circa 1962:
(Click on page for larger view)
The two “Yashica” branded electronic flashguns are interesting, more by omission from TLR user manuals than anything else. It would be almost 1970 before a Yashica branded electronic flashgun would finally displace bulb units in mainstream Yashica TLR user manuals. Nevertheless, the “Yashica Quick-Lite Pro-40”, shown top left did make an appearance in the 1964 user manual for the amateur focused Yashica E and also in the Japanese language manual for the Yashica Mat-EM. Below is Chris Whelan's fully working example:
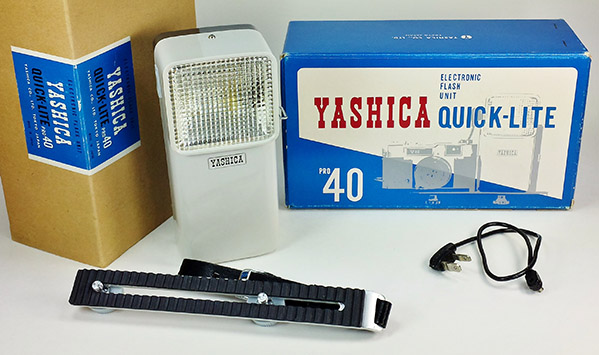
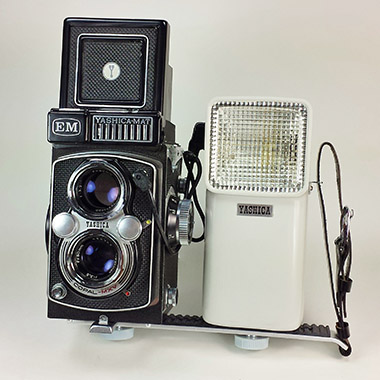
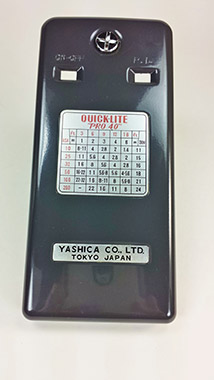
(Images courtesy of Chris Whelan)
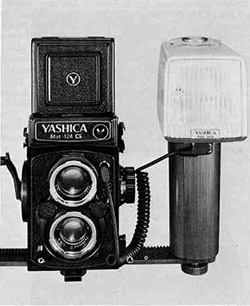
By the early 1970s, electronic flash had taken over completely. This is the Quick-Lite Pro 100 which appears in several manuals:
From the end of the 1970s, the Yashica Mat-124G could be paired with the large RTF540 handle, or hammerhead, type pro flash unit from Yashica's upmarket “Contax” branded range. It appears in the last 124G user manual and two versions of a later brochure with Kyocera ownership already evident. Released in 1978 and initially priced at US$540 (July 1978 Popular Science) - coincidence? This flash was made for Yashica by National, a Matsushita company these days known simply as Panasonic Corporation. Unfortunately, the 124G isn't able to utilise all of the flashgun's advanced abilities and obviously not the TTL flash exposure of the updated RT540 model. Nevertheless, a very powerful and impressive piece of kit which would still be desirable and useful for users today. Unfortunately, prices are still comparatively high for working items and most of the kits have seen a lot of professional use. Also, whilst there was a high capacity battery and mains power options, the standard power pack that is most commonly found these days (often, even that is missing) takes 12 AA batteries.
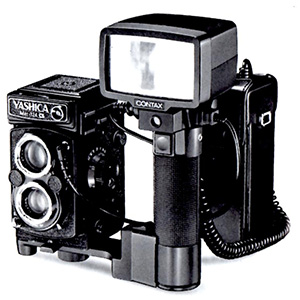
Note, some of the smaller, newer Yashica electronic flashes are hot shoe only and require a hot shoe adaptor to be used with the Yashica Mat-124G (and earlier TLRs).
Tripods
The earliest reference to Tripods that I am aware of is this tripod page from a catalogue issued by Australian Yashica importer Swift & Bleakley Pty. Ltd. circa 1962:
(Click on page for larger view)
All the models from this series have a “MY-” prefix. The page below is from a German Yashica catalogue for 1962/1963 with prices effective from 1 June 1962. Some of the models are the same, a few are different. The background picture below is the MY-5 (same as above):

(Document scan courtesy of Chris Whelan)
This is an example of a rather nice one with advanced features. I think it may be the MY-1 model from the catalogues.
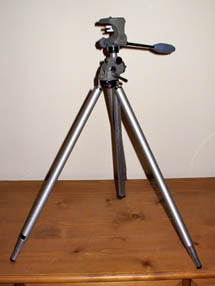
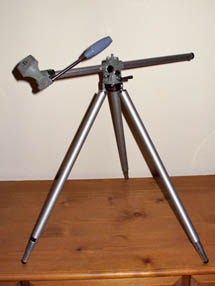
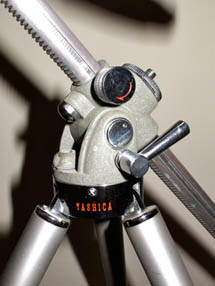
(Images courtesy of Richard Nixon)
I believe that the one below is Marked “MY-15”, although it looks like “MY-I5”. Owner Chris Whelan writes:
“It stands about 33 cm tall closed and 48 cm high fully cranked. With the legs extended it stands about 122 cm. It is in new condition... a beautiful piece of design and function.”
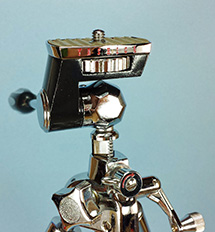
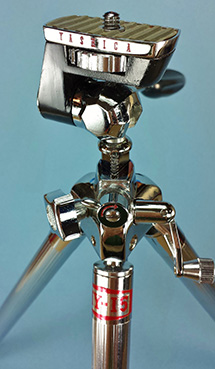
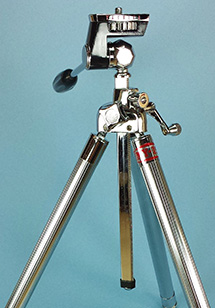
(Images courtesy of Chris Whelan)
This is another nicely sculpted one, model unknown but from a similar period probably. The legs get quite spindly when fully extended, a feature that seems to be a common to most Yashica tripods:
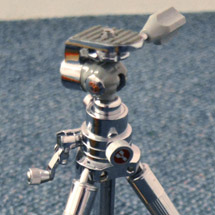
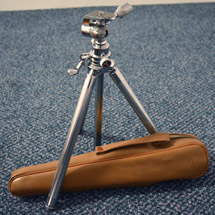
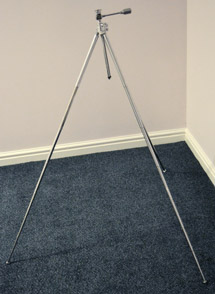
(Images courtesy of Callum Colville)
Research undertaken by Chris Whelan has led him to believe that the MY series are actually rebranded Velbon tripods, still a leading brand today. The company that made them started in 1955. As well as “Velbon”, one model at least was offered under the “Manon” brand name and there may be others. Chris has identified that there is a pretty close Velbon match for his Yashica MY-15 and the Manon is a complete match except that it has black legs. I can confirm that there is an exact Velbon version of the innovative MY-1.
The page below is from a brochure from around 1968 and also appears in Accessories Identified in User Manuals etc on the Accessories, Yashica TLR page with link to the full brochure. The featured tripod models from this later series are the ST-1, ST-3 and ST-5. They are all very similar except that the ST-1 has a geared elevator column, the ST-3 uses an ungeared centre column and the ST-5 misses out on the column altogether:

This is a nice example of the ST-1 with geared elevator column:
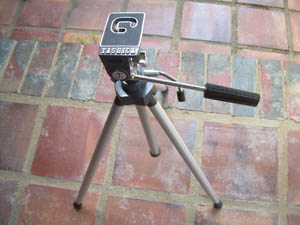
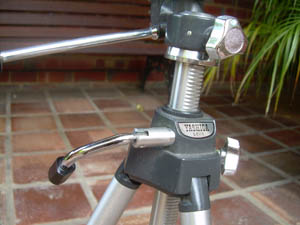
(Images courtesy of Leigh Harris)
The origins of the ST-1, 3 and 5 are unknown.
There is also an ST-7 which is a mini table top tripod. What is interesting is that it has a prominent “Germany” on the base as well as “Yashica”. It is actually a rebranded German Bilora Stabilet 1011, and found in all black as well as in black and silver as on this page from a post-1970 brochure, below left. Similar Bilora shown in two right images:

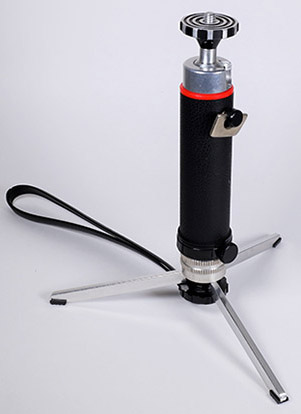
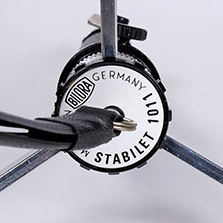
(Document scan and images courtesy of Chris Whelan)
Marketing Paraphernalia
Yashica Sailor Boy & Other Stuff
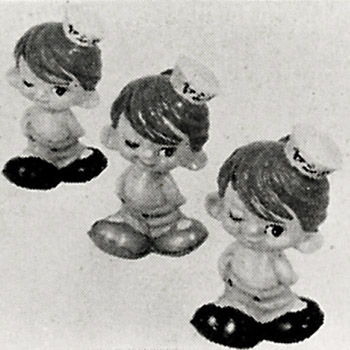
In the early 1960s, Yashica used a moulded plastic figurine of a boy in a sailor outfit as part of its marketing strategy. These days they would probably be considered vaguely disturbing, particularly from the rear, but nevertheless, they seem to be collectible.
10 cm Tall
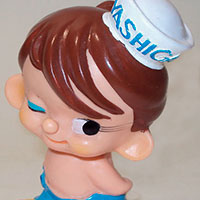 (Detail from larger web image)
I have seen this referred to as a US marketing initiative but in recent times, as many seem to have come up for sale in South Africa as in the US and there is the Japanese market version below, which appears fairly regularly on Japanese auction sites, and also features in user manuals (on this version, the name appears to be on a decal rather than moulded and is sometimes missing, presumed fallen off):
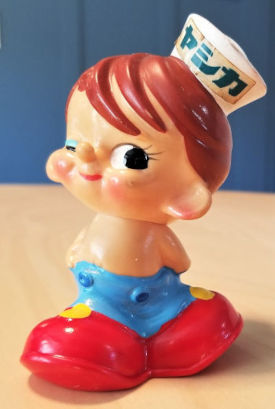 (Image courtesy of Chris Whelan)
Very little is known about the “sailor boy”. The commonly found ones are about 10 cm, or 4 inches, high. Both the English and Japanese versions are found with the inscriptions under the feet “Made in Japan” and “© 1962 Modern Plastics”.
20.5 cm Tall
There are also larger ones that are referred to as shop displays. There is a photo of two of the smaller ones next to a larger one described as “20.5 cm tall” (8 inches). With the larger one, the name on the cap is a decal for both Japanese and export markets. Contributor Chris Whelan has sent me photos of one he acquired from the original salesman who got it from his New York camera store in 1962. Chris has used his immaculate J3 35 mm SLR, also circa 1962, for a size comparison:
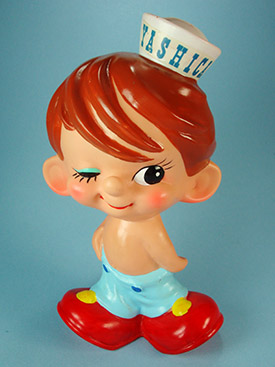
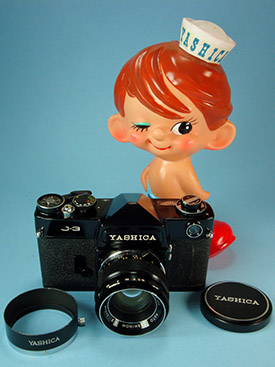
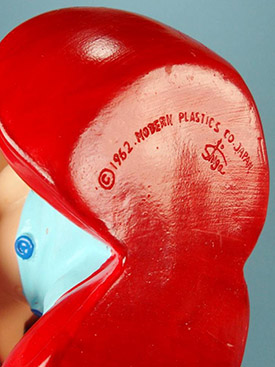
(Images courtesy of Chris Whelan)
Both the smaller and larger versions usually feature red shoes but some larger ones have green shoes instead. This is another of Chris Whelan's examples (missing the hat decal), note the four pointed star highlight in the left eye instead of the circular highlight in the eye of the larger red shoe version:
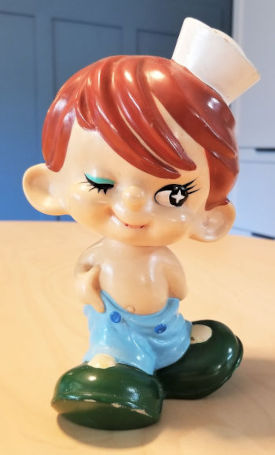
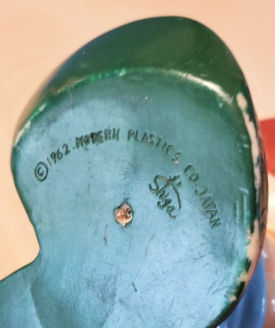
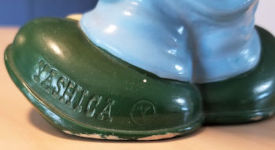
(Images courtesy of Chris Whelan)
103 cm Tall
The two unfortunately low resolution images below are crops taken from the same cover photo of a Modern Plastics brochure in Japanese which displays a range of figurines produced by the company. The large version with t-shirt on standing on a “Yashica” pedestal is undoubtedly a shop display item. The two images have not been resized at all so the sizes remain relative. In the the original photo, the large figurine is behind the others. In the second photo are four sailor boys in three different sizes:

 (Detail from larger web image)
If the four boys in the second image represent the size range of 10 cm to 20.5 ccm, then the large one must be in the metre range which fits with a claim by a seller that it is 103 cm.
Chris Whelan found a sailor boy 58 cm, or a little more, tall for sale (the angle of a photo of him with a tape measure makes it difficult to be accurate). We think he is actually the pedestal version with the pedestel chopped off. The bottom of his shoes have a large hole with a timber board inserted to which the edges of the shoes have been nailed. Unfortunately, the sale fell through and he couldn't be examined more closely.
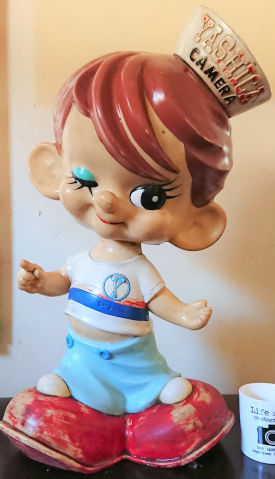
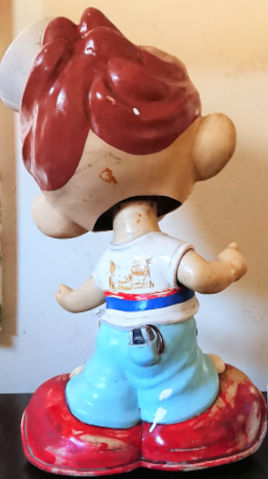
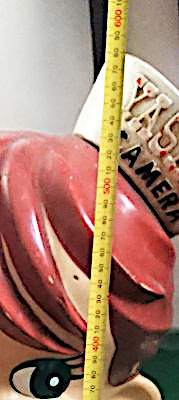
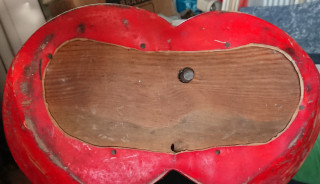
He shares the T-shirt with his pedestal mounted sibling, however, there could be some minor differences as the pedestal mounted one was made for the Japanese market as evidenced by the Katakana characters on the cap.
Variations and other Forms
The following sailor boy variations are mainly found on Japanese auction sites but the first example originates from South Africa. Chris Whelan has sent me a photo from a Japanese store that seems to have a complete set on display (except the large one on the pedestal above). This includes both the classic sailor boys above and the two variations below, and confirms that the variations are the same size as the small sailor boy. The photo also adds a large sailor boy with black shoes and an in-between size version which is about half a head taller than the small one. That fits with the second crop above. It is probably the rarest of the three.
The first variation is basically the same figurine but with pointy shoes and in place of the sailor's cap is a pointy cap in a style often associated with the nursery rhyme “Wee Willie Winkie”. There is no date and the inscription is limited to “Yashica” and “Made in Japan”. His hands are raised and he is holding what appears to be a black 35mm style camera with pop-up flash which places it at 1977 at the earliest (MF 35) but Chris Whelan believes the moulding features elements of the Yashica Five Star Auto Focus Motor design from 1981 with which I concur. Otherwise the head, expression and pants at half-mast are very similar.
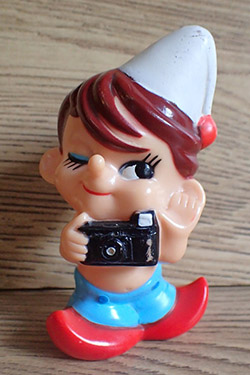
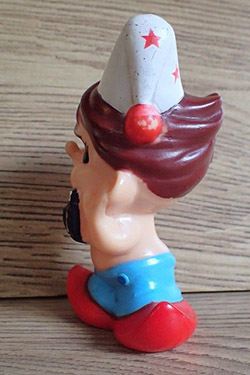
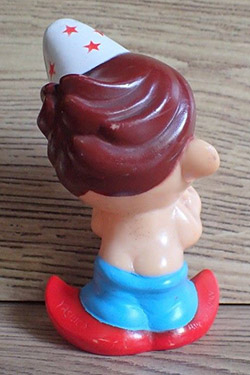
(Images courtesy of Felicity Grundlingh)
Same figurine together with original export version (the eyelash detail, whilst noticeably different here, is similar to the original Japanese market version further above):
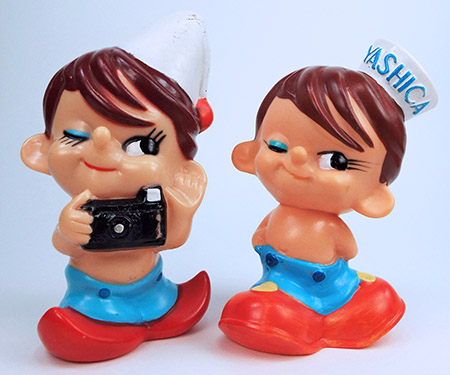 (Image courtesy of Chris Whelan)
An earlier fully clothed variation with probably Electro 35 camera in one hand, still with the same head and expression features, appears on a cloth clothing patch with the words, “YASHICA EXPO' 70 ELECTRO 35”. The photo shows it pinned to the paper backing it was supplied with:
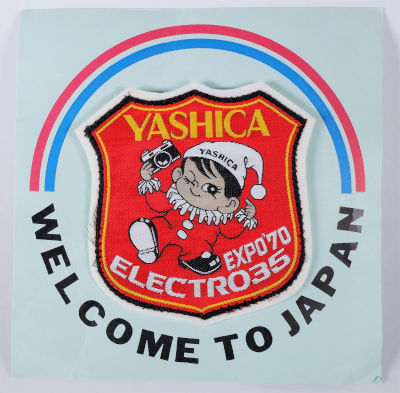 (Image courtesy of Chris Whelan)
The second variation is a fully clothed football player (presumably American football):
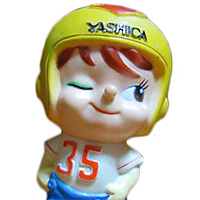 (Detail from larger web image)
The only reference I have seen to the figurines in Yashica documentation is the original sailor boy's use in various user manuals. In the 35 mm camera manuals, he is used to bring attention to “Remarks” comments for the Yashica Lynx-5000 and it seems that he appears once for decoration only in the Minister D manual. In some manuals, including the Electro 35 and some SLR ones from the time, he is used to illustrate depth of field. The only TLR context that I am aware of is in regard to depth of field in the 1964 Yashica E user manual:
Found on Yahoo Japan are several examples of a moulded candle version of the sailor boy. Only a wick on top of his head and waxy appearance to his finish give the game away. He is about the same height as a packet of Marlboro cigarettes. Next to him is a similar height wax Christmas tree candle:
 (Detail from larger web image)
These come in a presentation box with a Christmas scene on the front and a Christmas message from “Yashica” in Japanese inside.
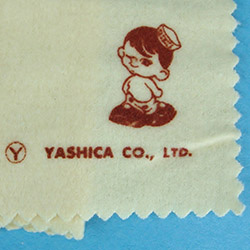
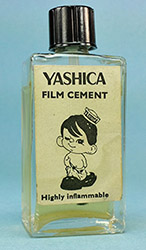
Below, the sailor boy also appears on a “Yashica Co., Ltd.” lens cleaning cloth with the wide “Y” logo found on TLR focusing hoods and a bottle of cine film cement with the later style name which date them to at least 1965 or later.
 (Images courtesy of Chris Whelan)
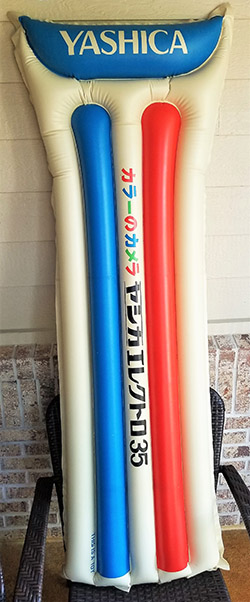
More late stuff. The “Electro 35” on the second beach bag below dates it to 1966 or later. If you're heading for the beach, you may want to take your Li-Lo (air bed) too. All bought from Japan:

(Images courtesy of Chris Whelan)
Speaking of bags, this one looks like a heavy duty shopping bag for picking up your new Yashica kit in Japan, both sides shown:
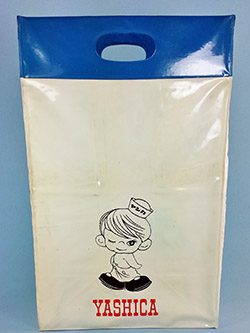
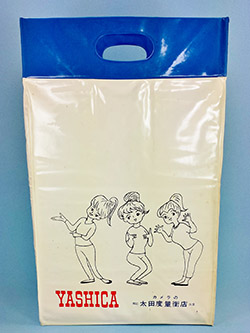 (Images courtesy of Chris Whelan)
Chris Whelan writes:
“Some of the Japanese brochures from around 1959 featured a 'Yashica Girl' drawing here and there. Well it turns out that there are 3 Yashica Girls.”
From the style of text and the presence of the three girls, the bag is more likely to be from near the beginning of the sailor boy promotion which we know started no later than 1962.
Yashica Cigarette Lighter & Ashtrays
Contributor Chris Whelan wrote, “the eBay seller had it listed as c1966. Not sure where he got his info from. It is new, never used and came wrapped in wax paper from the manufacturer.” From the font used, my thinking is that it is probably a little earlier. Red and blue stripes on a pale yellowy cream background appear on probably all 1964 and early 1965 TLR boxes but from December 1964, the font and Yashica “Y” is already the newer type. Chris tells me that his Yashica J-3 SLR box, which he believes is from around 1962, has a similar colour scheme:
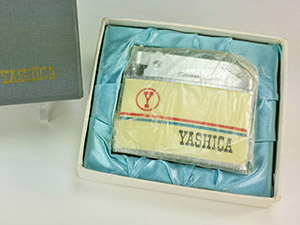
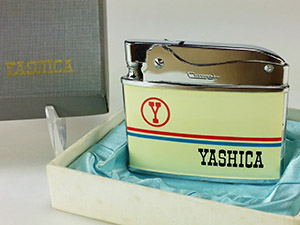
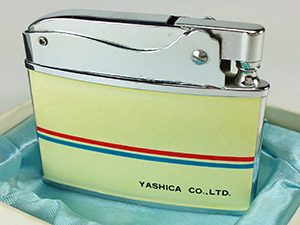
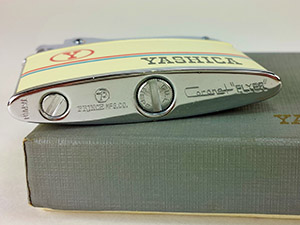
(Images courtesy of Chris Whelan)
The lighter itself is a Coronet “Flyer” made by the Prince Mfg. Co. I have seen two examples of a similar lighter in purple and tan livery marked on the bottom with 555 and “Penguin”.
A smoker's hardware is not complete without an ashtray but these took some time to arrive, from the style of name, second half of 1965 or later:
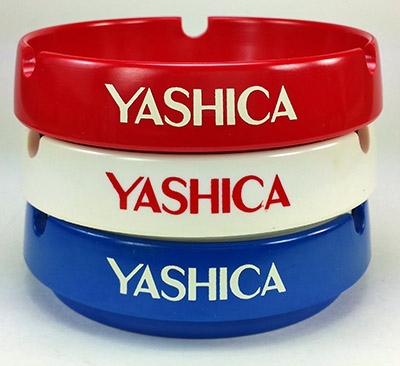 (Image courtesy of Chris Whelan)
Chris writes, “the ashtrays are made of Melamine and thankfully, are unused.”
Pocket Knife
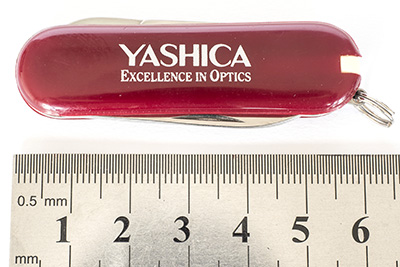
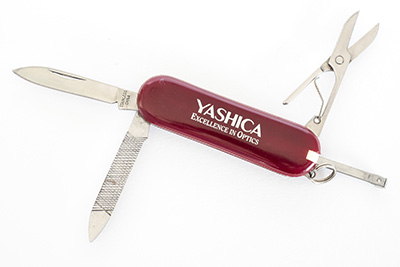
This attractive little pocket knife is originally from the collection of Tom Heckhaus. The “Excellence in Optics” suggests that it is from the post-1968 take-over of Tomioka. Contributor Chris Whelan thinks that it may be from the early Kyocera period (post-1983):
Yashica Watches
There are a vast variety of watches featuring Yashica branding. There are Swiss movements, quartz types and digital watches. There are divers watches and dress watches, both gents and ladies. They seem to span from the 1960s through to Kyocera branding appearing alongside Yashica. There is virtually nothing documented about them but as they didn't appear in catalogues or brochures, they are most likely promotional items used for marketing purposes including performance rewards and dealer incentives. One watch site claims that a similarly marked digital watch was given to all buyers of the Yashica FR SLR camera. Below are some random examples:


(Detail from larger web images)
Clothing Patch
Tom Heckhaus has sent me an image of a clothing patch. The origins of this are not remembered so we don't know whether it is a Yashica item or commissioned by someone else but it is the kind of thing that we could wear with pride! The camera model looks like a Yashica Mat-124G so its obviously no older than from 1970.
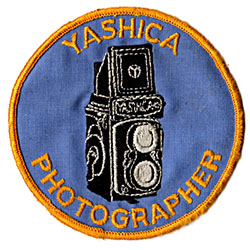 (Image courtesy of Tom Heckhaus)
Yashica Transistor Radio & Phonograph
You may wonder what transistor radios have to do with TLRs but after you return from your picture taking expedition and adjourn to the darkroom, what better way to enjoy those quiet hours in the dim red light than to listen to some music on your Yashica? In my view, definitely a photographic accessory.
Historically, it has some relevance (see Yashica Success & Failure). In the late 1950s, Yashica sought to expand into all areas of consumer photography interest. At the same time it was looking at further opportunities to diversify into non-photographic products and it seems that consumer electronics and transistor radios was a first step. It is possible that the company, Yashima Electric Industrial Co., Ltd., was a Yashica subsidiary as there were product similarities and they shared a similar model naming convention (there were several other companies with Yashima in the name but with no apparent connection). There is also reference to a Yashima audio components maker in connection to both Yashica earlier and a later mid-1970s SLR, the Yashima EMC750 (see Camera-wiki.org). It seems likely that Yashica models came first - they seemed to have stopped abrubtly before Yashima models appeared in the early to mid-1960s. Yashima is known to have made some radio models for the brands Captain, Capital, Magnasonic, Peerless, Durando and others as well as under its own name. Both Yashica and Yashima also bought in products to fill out their product lines. Whether Yashima was connected or not, ultimately it was a dead end for Yashica with an unsuccessful foray into the TV receiver business being one of the factors in Yashica's later financial woes leading to the Kyocera takeover.
Back to the interesting bit. Contributor and collector of all things Yashica, Chris Whelan, has managed to obtain this very nice example from the early days of the portable music and communications revolution:
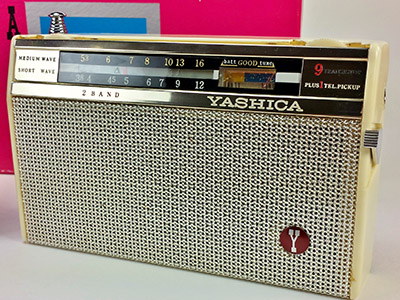
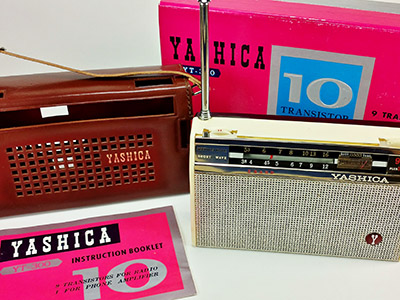
(Images courtesy of Chris Whelan)
Chris writes:
“As best as I can tell, the YT-300 was designed in 1959 on the heels of the YT-100 transistor radio that sold for about 8,000 Yen in 1959 (US$39.95 in a US brochure) and distributed to the world markets in early 1960. We found that Singapore Free Press article (dated 21 July 1960 and that also makes reference to the YP-500 radio-phonograph) but the earliest that I've found an advertisement for is in the Singapore Free Press in April 1960 where it is listed for $144 Singapore dollars (or at the time, Malay and British Borneo dollars) with all the goodies. My 1960 Yashica Pentamatic brochure has it listed for US$69.95 with goodies. What surprised me as I looked this set over is just how much of the electronics inside the radio have a "Y" or the word "Yashica" on them. Sure there are a few things that were made by more traditional Japanese manufacturers, but Yashica was involved in the making of many of the components.”
Chris has more recently also acquired an example of the YT-100 transistor radio:
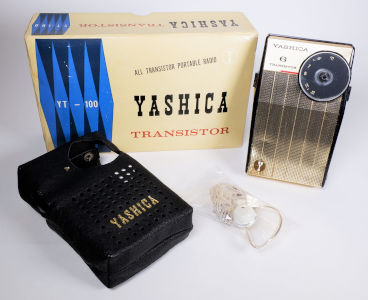
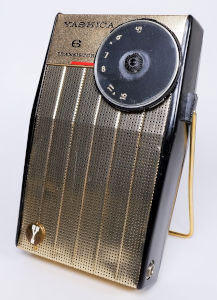
(Images courtesy of Chris Whelan)
And now, for some real luxury! Graham Buxton-Smither has sent me a photo of his “Yashica Stereophonic Radio Phonograph”, model YP600A. It is known to have been advertised in the Singapore Free Press by the local Yashica importer in early 1961. Graham says that it runs on D cell batteries:
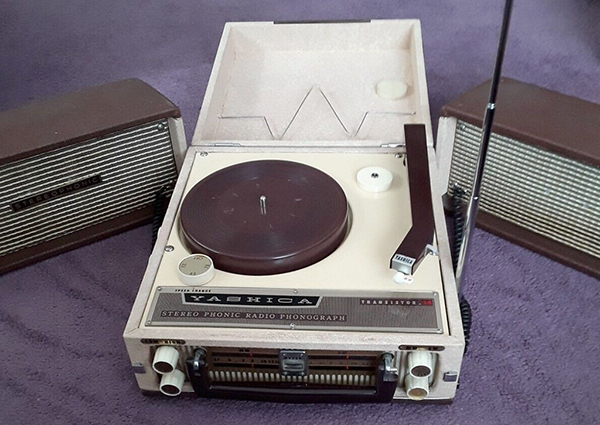
(Image courtesy of Graham Buxton-Smither)
Graham is a Yashica/Contax fan and over the years has collected a treasure trove of goodies which are in his flickr gallery. Whilst his focus has been 35 mm, there are also TLRs and other formats, all sorts of accessories which are also applicable to TLRs, much marketing paraphernalia and odd items like the Phonograph. There are some other brand cameras too, but all interesting.
Yashica Binoculars
If you're the sort of Yashica photographer that likes to carry binoculars with you, here's a lovely pair of Yashica 7 x 50s that won't look out of place in your camera bag. The JB 27 maker code tells us that they were made by Sanyo Koki Co. Ltd., but Yashica was happy to put it's name on them:
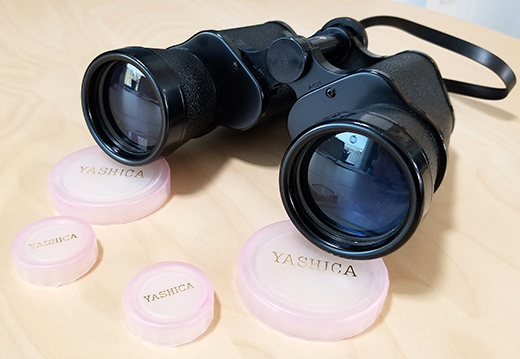
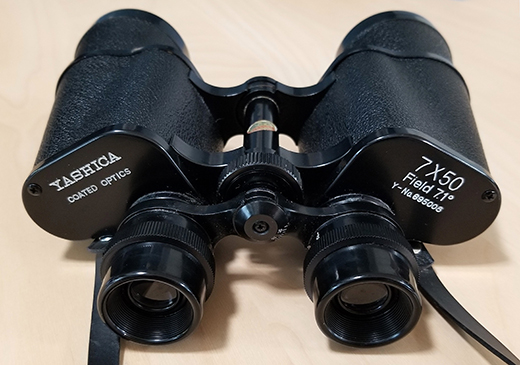
(Images courtesy of Chris Whelan)
Yashica Made “Sterilair” Air Steriliser
Brazilian correspondent Mario Nagano has written to me about the “Sterilair” air steriliser manufactured by Yashica's Brazilian subsidiary (see Brazilian Production). It is not an air purifier, or dehumidifier, but was designed to rid the air of dust mites and other microorganisms which can contribute to various allergies and respiratory irritations. Apparently, it has also been found to be effective in eliminating mould spores and Mario has confirmed that he has been successfully using the devices to protect his cameras and lenses for over 20 years. The Sterilair works by using convection to pass air through the capillaries of an electrically heated ceramic block (up to 350 C). Note, whilst the device may prove effective at controlling mould spores in the storage environment, unlike a dehumidifier, it will not affect mould spores that may have entered the camera/lens out in the field. Over 2.5 million units of the original metal type and newer plastic versions are claimed to have been sold.
The device was invented in 1982 (some references) or 1983 (Wikipedia, also the year the Brazilian patent was filed) by physicist Dr Alintor Fiorenzano Jr. who lived in Petropolis, a humid mountain city, and suffered from respiratory allergies. He was also a Professor at the University of South Carolina in the USA. The initial device was called “Clover” and he set up a small company in Petropolis to manufacture it. In order to expand the business, he went looking for a large company that would be interested in taking over manufacture. Mitiko Ogura, Vice President of Yashica do Brasil (unusally for the time, a woman, the daughter of an expatriate Japanese couple), was very interested and sent an example for testing to Professor Hideo Arai, head of the Biological Research Section of the Department of Science at the University of Tokyo. Other examinations were also undertaken including at the New York Testing Laboratories and Yashica also sponsored tests at the Hospital dos Servidores do Estado, in Rio de Janeiro Brazil. A contract was signed in 1988 and Yashica commenced production in 1989.
Mitiko Ogura was bullish about export potential. In a contemporary news report, she anticipated exports of 20,000 units per month to Japan and 10,000 to France and had big plans for the US. I haven't been able to discover how successful Yashica was but Sterilair these days is said to have exported to over 20 countries.
Sterilair front view with stand positioned for use on table, floor etc., side view with stand positioned for hanging on a wall or inside a closet and close-up of the label:
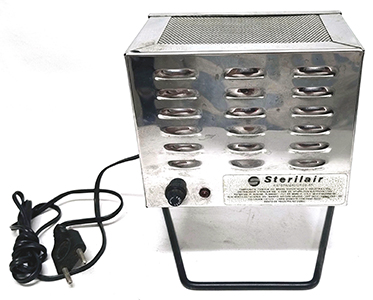
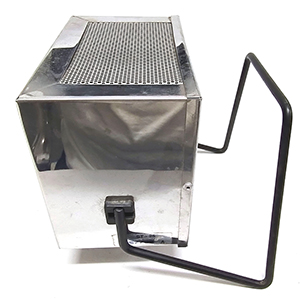
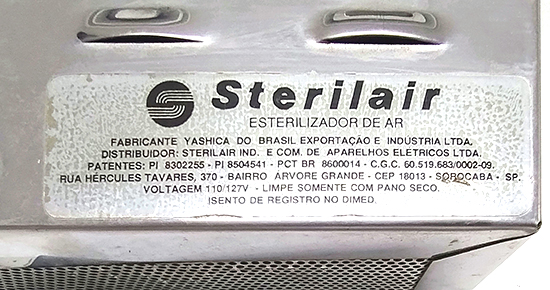
(Images courtesy of Mario Nagano)
The label indicates that the device was manufactured by Yashica but that distribution was undertaken by a separate Sterilair company. The label below is almost certainly earlier, identifying only the manufacturer Yashica:
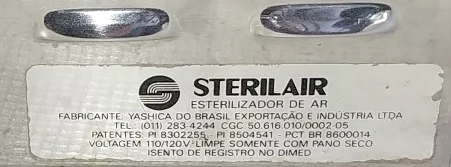 (Web image)
Box with Yashica name on lower left:

(Web image)
An October 1991 newsletter refers to Mitiko Ogura as the “director of the Sterilair division in Yashica”. She left Yashica at some point and somehow took Sterilair with her to become a new standalone company which she owned and it still exists today. Below is a label from an otherwise identical device to above which indicates that it was manufactured by Sterilair and the separation from Yashica was complete:
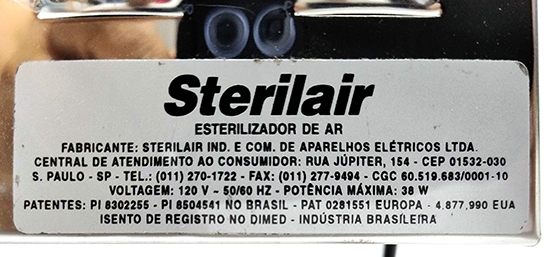 (Image courtesy of Mario Nagano)
Note, most sources only mention Yashica, not Kyocera even though the acquisition by Kyocera was completed in 1983. However, a news article about Mitiko Ogura from around the time of Yashica starting production makes several references to Yashica do Brasil as a subsidiary of Kyocera.
Accessories (Non-Yashica)
For interest sake and for the benefit of users of Yashica TLRs, I have decided to include some useful non-Yashica made accessories.
Arca-Swiss Compatible Tripod Plate
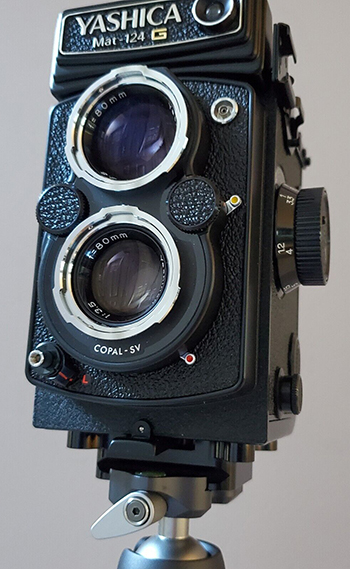
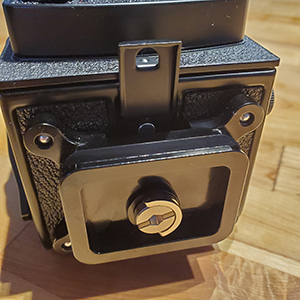
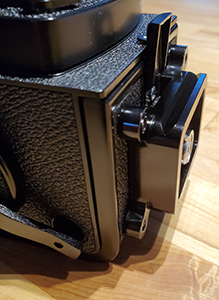
For anyone wanting to use their Yashica TLR on a tripod, there is nothing more useful than this Arca-Swiss compatible tripod plate designed by John Marsden for use with his own Yashica Mat-124G (for compatibility, see below). John was frustrated with commercially available plates that would always twist loose. This bespoke item is designed to stay securely locked in position and therefore remain completely stable:
It's an elegant but straightforward design. In John's own words:
“The clamping load is taken on the tripod mount by the 24mm diameter ring around the ¼-20 hole.
The four legs have a close clearance fit to the pegs and cover floor. I didn’t want to have a scenario where the legs touched the floor first and as the screw was tightened might distort the cover.
The legs also offer the no-twist feature that was important to me. There are no pads the plate locks down very well with the captive screw and there is no movement with just finger tightening.
I used the camera and plate for about 6 months with the prototype and had no issues of it marking the camera.”
Two plates showing bottom and top detail:
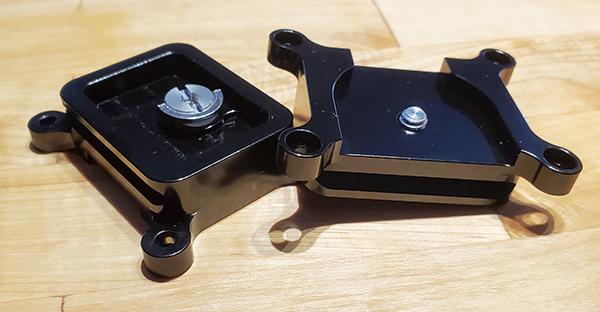
Mounted to camera:
(All images courtesy of John Marsden)
John is currently (October 2024) selling these on eBay, Item No. 335626543844.
Compatibility: As noted above, the plate was designed to specifically fit the Yashica Mat-124G. John has not tested it with other models and I don't have an example to check. I imagine that the 1970 and later Yashica D, 635 and Yashica-Mat with black locking rings and mounts are the same. However, I have checked my Yashica Mat-124G against a range of other Yashica TLR models dating back to early 1955. There are two critical dimensions to consider; the location of the legs relative to each other and the the tripod mount centre and the distance between the high point of the tripod mount and the camera body. The diameter of the bottom locking ring could matter for the plate cutout but I can confirm that both black and chrome locking rings are the same.
My checking has been relatively crude. To confirm the positioning of the legs relative to the tripod mount, I laid the 124G and the test model on their backs aligned feet to feet. As much as I can tell by eyesight alone, all “new body” types (knob and crank-wind) with the chrome locking ring already line up exactly and feature the same style and size legs, i.e. all Yashica and Yashicaflex TLRs made since about September 1955, including Yashica A, D, 635 and Mat and later derivatives. Before this, there were some new body Yashicaflexes made for some months still with the earlier locking lever rather than ring - the leg spacing of these is not compatible.
John had the impression that the chrome locking ring and tripod mount looked thicker and therefore the plate may not work properly, potentially leaving the legs suspended and free to move slightly. My measurements suggest otherwise, they appear to be the same. My method was to place a block across the mount and measure the distance to the body. If I am wrong, it should be relatively simple to add a spacer of some sort. Note, in the end, it is “caveat emptor”.
Filters & Hoods
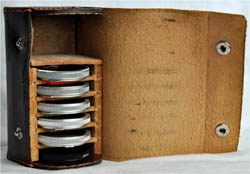
Five of the six filters displayed below are Franke & Heidecke Rollei branded items, the black rimmed model on the left is the Yashica branded item also displayed in Filters:

(Click on right hand image for larger view)
(Images
courtesy of Göran Årelind)
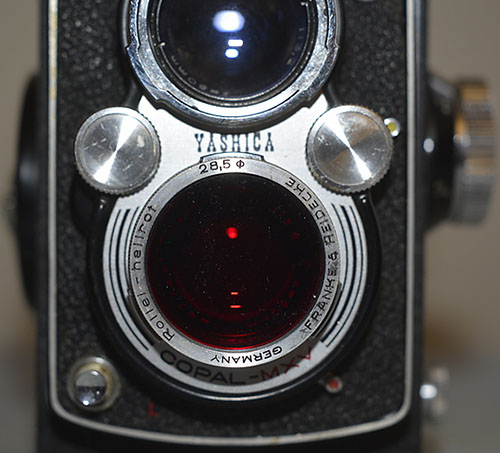
Like the Yashica, all the Rollei branded filters shown are standard Bay 1, nominally 30 mm in diameter. The Yashica is marked “30 mm” but one of the Rollei filters is marked “28.5”, implying “28.5” mm. Apparently, this appears on all earlier Rollei Bay 1 filters - I'm not sure what that is measuring although I have seen suggestions that it is somehow linked to the fact that early pre-War Rolleiflex Standards and Automats used 28.5 mm push-on accessories. Note that Rollei filters and lens accessories are also available in larger Bay 2 and 3 mounts which are not suitable for Yashica TLRs.
Correspondent Michel Le Mandat has written to me regarding his experience with Rollei accessories on his Yashica-Mat. The Rollei lens hoods won't fit the outer Yashica bayonets (see A Note About Yashica Bay 1 Lens Mounts) but the Rolleinar close up set (see further below) and filters are no problem on the inner Yashica bayonets. Red Filter below with the 28.5 marking noted above:
 (Image courtesy of Michel Le Mandat)
An early Walz Bay 1 yellow filter found with a very early Yashica Flex S:
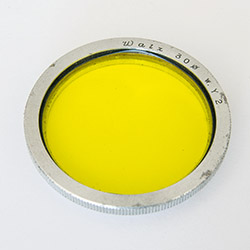
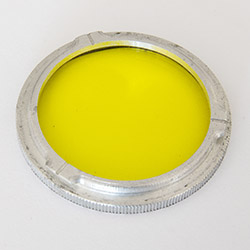
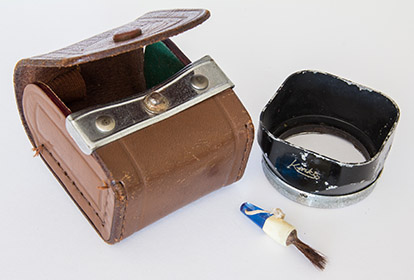
Below is an early Kenko Bay 1 lens hood found with the same camera and both filters and hood fit well. The case has “Malion” embossed on the front so is probably not original but it is old and interesting - the lens brush has a built-in holster (just visible inside the lid):
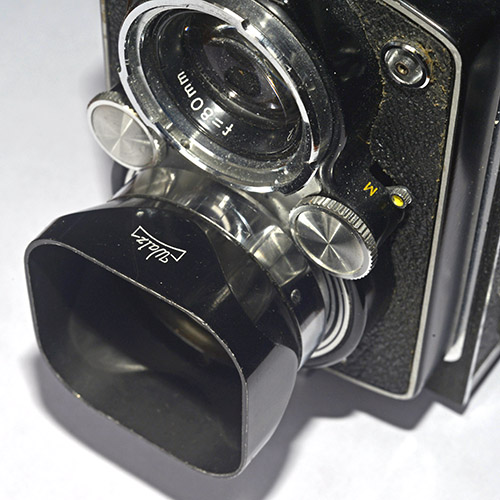
Walz Bay 1 hoods are also common from this period, this one mounted on a later Yashica-Mat. They fit without issue:
 (Image courtesy of Michel Le Mandat)
Push-on type hoods marked ACE 32 or 28.5 (used with supplied step up ring) and brands such as Tubasa and Walz are the most common found with the early Yashima cameras - more details here. Below is an Actina branded 32 mm push-on filter holder made in Britain which can be used with or without the hood (the diameter of the actual glass filters is 28 mm):
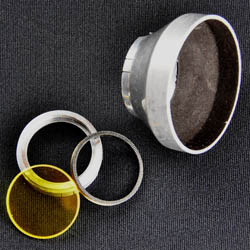 (Image
courtesy of Göran Årelind)
Below, also from Britain, is a “B.D.B.” branded 32 mm push-on filter holder which can only be used with the hood (the diameter of the actual glass filters is 31 mm):
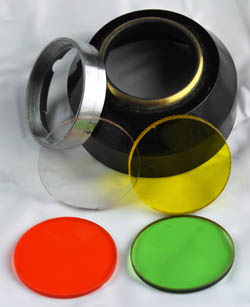 (Image
courtesy of Göran Årelind)
At some point, Actina and B.D.B were/ became linked.
Hoods were offered by both accessory makers and the various TLR manufacturers. They are generally interchangeable, the main things to watch for are the diameter of push-on versions, whether Bay 1 hoods use the the inside or outside mounts (some current plastic eBay versions use the inside mount so that filters cannot be fitted) and whether the hood is suitable for 44 or 66 series cameras. As highlighted in A Note About Yashica Bay 1 Lens Mounts, the Yashica external Bay 1 mount may be a fraction oversize and can be problematic for Rollei lens hoods particularly.
Alternative Lens Caps
As I have mentioned elsewhere, original lens caps are not so easy to find now days. Lens caps from other makes may fit. The things to check are the push-on filter mount diameter or Bay 1 alignment for the respective types and the distance between lens centres. For example, I understand that Rollei and Minolta Autocord Bay 1 types may fit. There are also plastic generic Bay 1 types at quite cheap prices from at least two different sources. I have tried an Indian made knock-off of the Yashica second soft plastic type, complete with “Yashica” name - only one end would fit at a time. I think some of the others are better. I am not aware of any generic push-on types but it may be possible to find something that fits each lens individually - they don't have to be joined, e.g. DIY from plastic screw caps etc.
Here are a couple of examples of what is possible on the DIY front. Personally, I have been using a plastic screw cap from a juice bottle as replacement back cap for a Leica thread lens. More relevantly, correspondent Tom Dorsey has used a drink bottle cap to protect the rear element of his TLR auxiliary wide angle viewing lens for which Yashica didn't supply a cap:
 (Image courtesy of Tom Dorsey)
The next section features a commercially available 3D printed solution but such printers have become much more accessible, e.g. my local library now has 3D printers available for local residents to use.
3D Printed Lens Hoods and Caps
Correspondent Gordon Brown discovered these on eBay and bought a set for his Yashica 44A. The lens hood is an unusual design in that it incorporates a viewing lens hood too and the cap fits the hood rather than the lens bezels:
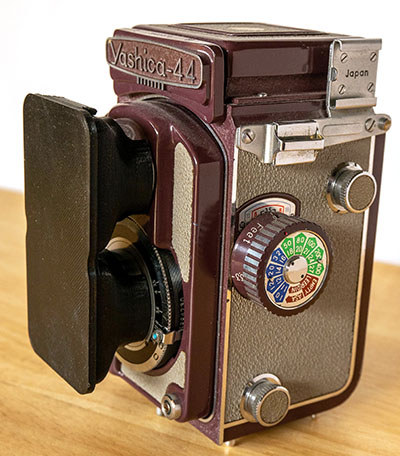
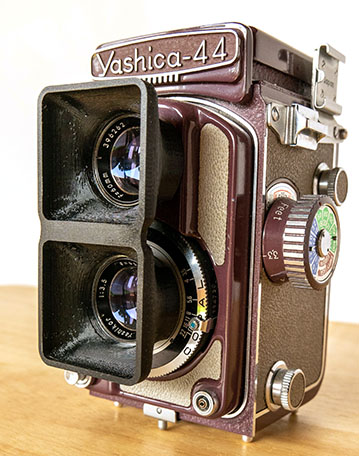
(Images courtesy of Gordon Brown)
Gordon says:
“It is a tight fit to put the hoods, one assembly, on the lenses. The hoods extend approximately 3/4 inch (about 19 mm) out. The hood cover attaches easily. I prefer the Yashica branded lens hood and lens caps.”
I think that the viewing lens hood is unnecessary and I agree with Gordon's summation but others may think differently and for users, it may be a very good solution, particularly if no other hood and/or cap is available (the Yashica 44A slip-on type is extremely rare).
These are available from USA eBay seller lmedinc whose eBay store is Shutterspeedblog. They are his design and he 3D prints them. He also advertises versions suitable for the Yashica 44/44LM, Yashica A and Yashica 6x6 Bay 1 bayonet models such as the Yashica D/635 and all the crank wind models. These other ones are a similar design but note, the lens caps fit the lens bezels in the normal manner, not the hoods.
Minolta Autocord Autopole
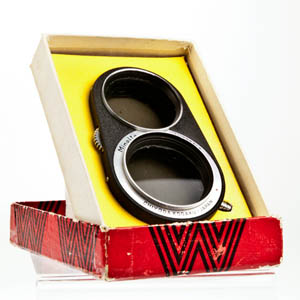
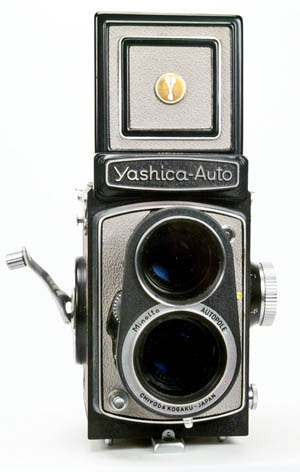
This is a polarising filter for Bay 1 equipped TLRs. It was made by Chiyoda Kogaku for their Minolta Autocord cameras but also fits the appropriate Yashica and Rollei models. The clever thing is that the top and bottom filters are geared together so that the effect of the filter can be seen in the viewfinder as angular adjustments are made. As far as I am aware, Franke & Heidecke didn't offer anything like this, the Rolleipol being a conventional single lens type with an appropriate size Bay mount. However, Zeiss Ikon did produce something similar called the Ikopol for their Ikoflex models (not suitable for other TLRs, something like 32 mm viewing lens and 37 mm taking lens mounts). The Minolta Autopole below is also shown mounted on a rare and rather nice Yashica Auto.
(Images and information courtesy of Tom Heckhaus)
According to Tom Heckhaus:
“It’s difficult to put on but does work. You must carefully line up the bayonets then push forcibly until it sits on the taking and viewing lens then rotate the locking lever. Removing is difficult as well. Make sure the Yashica’s lens is focused at infinity, so you don’t force the focusing mount.”
The difficulty in fitting has been confirmed by another correspondent - it seems that Minolta and Yashica bayonets are very close in design but the outside bayonet is not exactly to the same spec.
Other interesting accessories for the Autocords were the self-explanatory “Minolta Autocord Panorama-Head” and the “Minolta Autocord Paradjuster” which was placed between the camera and tripod and used to adjust for parallax error when using close-up lenses. This last item was nicely made but a little inconvenient in use (after focusing, the camera is raised for the exposure) and is unnecessary with the parallax correcting Yashica close-up sets (these have their own limitation, they can only be totally effective at one distance).
Rollei Panorama Head
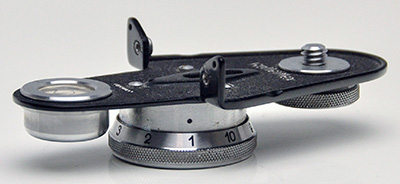
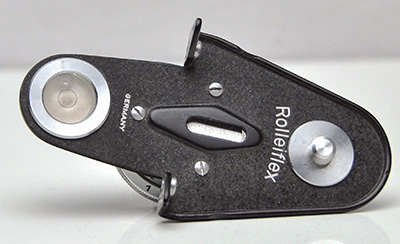
This is a self-explanatory accessory. There were apparently at least two types made, the one depicted below is very similar in appearance to the Minolta Autocord Panorama-Head referred to above.
(Images courtesy of Göran Årelind)
Göran Årelind tells me that there are parts that line up with the fittings on Rolleiflexes but that both Yashica 66 and 44 models can be used with this accessory.
Rolleinar Close-up Lenses
The Rolleinar close-up lenses were available in in three sizes; Bay 1, Bay 2 and Bay 3. Only the Bay 1 is applicable to Yashica. There were three different sets in each size; Set 1, Set 2 and Set 3. A circa 1960 brochure defines the focus ranges for each set as follows:
Set 1: 100 - 45 cm
Set 2: 50 - 31 cm
Set 3: 32 - 24 cm
Like with the Yashica close-up sets, there is a taking lens and a parallax corrected viewing lens with alignment mark. Apparently, there are differences between earlier and later versions but that is beyond the expertise of this website:
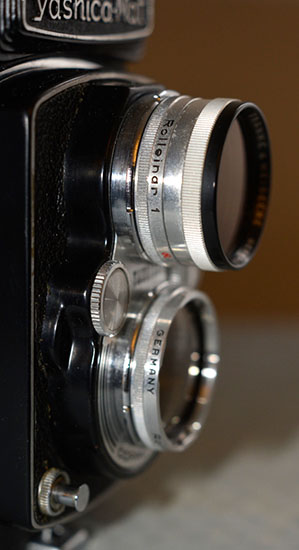 (Image courtesy of Michel Le Mandat)
Yashica 44LM Neck Strap by Jessop's
Contributor John Ransley sent me details of an accessory Yashica 44LM neck strap originally marketed by well-known UK camera chain, Jessop. Note, only one 44LM post clip is shown attached:
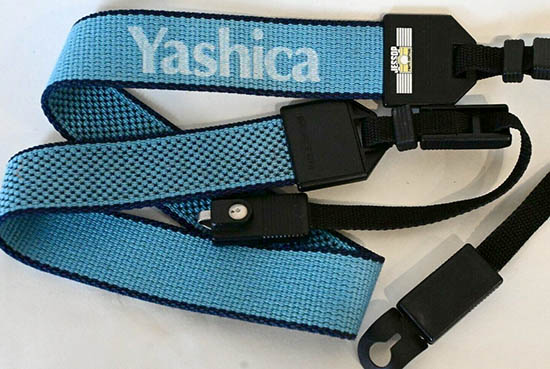 (Detail from larger web image)
The original type post clip is here.
Minicam Flashguns
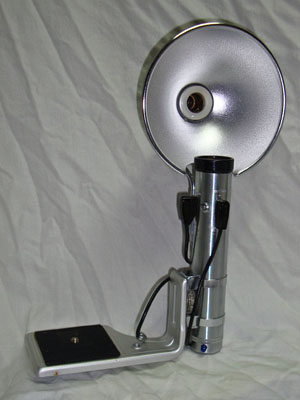
The flashguns depicted in early Yashica manuals were almost certainly Minicam Synchron units made by Minicam Research Corporation with the address given in the brochure below as 81 Nakanecho, Meguro, Tokyo, Japan. It is very likely that the name was influenced by US photographic lighting specialist, Heiland Research Corp. There is no evidence that there was link with Yashima other than Yashima using the flashbulb type Synchron units to illustrate flash use in its manuals. It also tends to confirm that accessories found in early user manuals were not necessarily Yashima made or branded. Nevertheless, the company is worth mentioning anyway as it seems to have been a significant supplier of flash lighting equipment in the 1950s and was part of the TLR experience at the time. In the course of my research, I have acquired a couple of examples and manuals etc and it would be a shame to let this piece of photographic history slide into oblivion without some form of acknowledgement.
This section is not meant for users in the modern environment but if you believe that film has benefits over digital, then perhaps there is also something special about firing a big bulb in a big flashgun. The large, polished reflectors with decent separation from the lens and big bulbs give a unique quality not achievable with later, smaller types. And they can be strung together in a multi-flash set up.
A seller on eBay claimed that he had bought a Synchron Junior flash of the type shown below together with a Nikon camera when stationed in Japan in 1952. Another seller advertised their's as being from 1953 so they were certainly available from the right period onward.
Instructions & Brochures
There are several PDF brochures and manuals floating around the net. Two were available for download from Camera Oldies Workman's Photography but the site seems to be permanently down. You can contact me for copies. There is another from Orphan Cameras, just follow the links from the home page.
This last is a little risque and highly unusual for the 1950's, featuring a topless woman on the cover which would certainly have been at odds with Yashica's mainstream marketing approach. There is another, perhaps more common and I believe later, version with a butterfly with folded wings replacing the woman. They are almost identical in other respects but there are some very minor differences, e.g. the optional brackets have been revised. One of these two is often in kits of the type shown below. The Orphan Cameras example, whilst possibly more interesting to look at, is crucially missing the three panels with the actual user instructions (I know this from examples that have been for sale). The butterfly version is downloadable from this site:
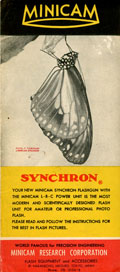 (Click on cover to view full brochure as PDF)
There also appears to be an older document with what may be a picture of a Rolleicord with a Synchron Master flash and a Nikon with a Synchron Junior flash on the front cover. This has “1953 Catalog” on the front cover and appears with a number of kits.
Synchron Models
The “Synchron” series was available in three models; the “Professional” and “Master” using “D” cells and the “Junior” using “C” cells. Some accessories were interchangeable but the Master was more professional than the Junior with, for example, a greater range of reflectors available, and “less plastic” (the only plastic I am aware of is the black band at the top of the cylindrical body of the Junior). The two prong connectors were also different with the Junior using round pins and the larger flash guns using flat pins versions. There was a range of brackets for securing the flashes to the tripod sockets of cameras including generic types, generic TLR types and specialised Rollei fittings (with integral tube clamp, probably only available in the larger size). Slave units were available for both the Junior and larger models as were various leads and connectors to suit different types of flash sockets in use at the time. Today, the Junior is the most commonly found model on auction sites etc. Accessories are very rare, although I have seen various leads turn up.
Synchron Master & Professional
These two models confuse me. The instructions refer to a “Professional LBC” unit (see “Operation” below for explanation of “LBC”) without providing much detail and also the availability of a “Professional model RSM” reflector for “any of the Synchron Master flash units”. As far as I can tell, Synchron Master kits come packaged as both “Minicam Master Model Flash Equipment” and “Synchron Master Professional Flash Unit with Original LBC Circuit”.
My take from brochures and photos is that the Master is basically an up-sized Junior and that both were probably supplied without the LBC components. The “Professional” may be a separate model or it may be a Master supplied with the “Professional model RSM” reflector and LBC components as standard. Either way, any Master could be brought up to similar specs with the available optional accessories.
The examples of the “D” cell units in Yashica user manuals are fitted with the “Professional” reflector.
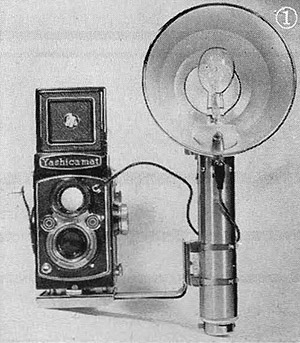
This example is from the earliest Yashica-Mat user manual with “Yashicamat” nameplate but is the same as in the Yashica A and Yashica Auto user manuals as mentioned on the previous page. Bizarrely, it appears to be using the earlier two piece bracket which seems to pre-date the first Yashicaflex A and AS user manuals (see below). Note that everything about the Master is bigger than the Junior pictured further below including a longer neck on the camera baseplate bracket, however, the Master fitted to the Yashica A uses a bracket with shorter neck (i.e., the reflector is closer to the camera). The brackets for Master and Junior may be interchangeable. Below is detail from the front and rear of the reflector:
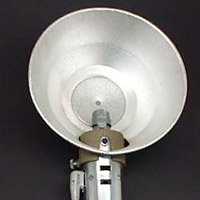
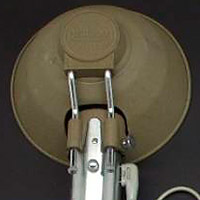 (Detail from larger web images)
Note the flat pin connector type which is incompatible with the round pins of the Junior.
There is a version stamped “for Mamiya Press” with special attachment point. I suspect that it is also based on the “Professional” specs.
Yashicaflex AS-II & Synchron Junior
The Minicam Synchron Junior was the first model to appear in Yashicaflex/ Yashica user manuals including the first Yashicaflex model A and model AS manuals (probably 1954). It also appeared in the earliest Yashica LM user manual from 1956.
.jpg)
.jpg)
This photo is of a Minicam Synchron Junior, with TLR bracket, fitted to an early Yashicaflex AS-II (the eagle-eyed will note that the left photo uses a PC flash connector whilst the right exhibits an ASA type). Compared to the setup in the Yashicaflex A/ A-II user manual, the sync cord is on the “correct side”. In the photo from the Yashica LM manual, it is on the opposite side. The handle actually has sockets on both sides and it doesn't matter which is used for camera sync and which is used for connecting remote slaves (up to 6).
From user manuals and the apparent different ages of kits, the bracket with single piece baseplate and neck with tripod screw fitting appears to be the later type (same as in the Yashicaflex A and AS user manuals). It also has an additional female thread for a tripod screw in the head of the screw for securing to the camera base. The earlier type is joined from two pieces and is missing the tripod fitting as well as the female thread in the securing screw:
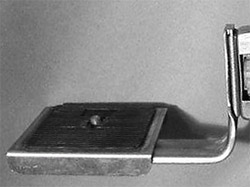 (Detail from larger web image)
Synchron Junior Universal Kit
This photo is of a Minicam Synchron Junior kit with universal type bracket fitted to a late Yashicaflex A-II. From experience, the above TLR type is almost essential to stop things flopping around.
.jpg)
.jpg)
Here are some more photos of the flash kit which appears to be reasonably complete, even with test bulb and “Minicam” labelled plastic bag (not shown). However, there are no instructions or other documentation (the original of the downloadable version above was obtained separately). Although instructions are not mentioned in the box contents, the topless lady/ butterfly instructions/ brochure is often found with other kits.
(Click on right image for larger view)
The bottom of the box does provide a list of accessory brackets and leads available:
(Click on image for larger view)
.jpg)
The blue cover is most probably Minicam supplied as it also appears with at least one other kit. It is a folded plastic sleeve which when opened out, slips neatly over the reflector with one of three sides, or faces, to the front. There is a blue side, obviously for correcting the colour temperature of clear bulbs to match daylight colour film, a clear side to reduce danger from shattering bulbs and a translucent side to help diffuse the light.
Synchron Junior TLR Kit
Correspondent Jeff Hellige has kindly provided me with details of his Synchron Junior TLR kit. Jeff says:
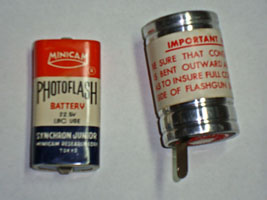
“Unlike yours though, which has the highly polished reflector, mine has a satin reflector. It also came with the cords and the LBC capacitor and battery, though the box states it can use normal C-cell batteries. The LBC 22.5V battery is similar in size and shape to a modern 9V, while the capacitor is like a C-cell with a tab sticking off one end.”
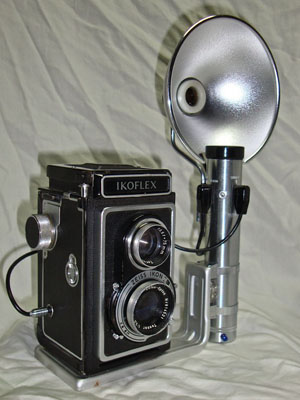
(All four images courtesy of Jeff Hellige)
Packaging of Kits
I can't discern any differences between the actual flash units themselves but one (maybe the earliest) uses sync cords with the cords exiting straight out of the plugs instead of at 90 degrees and as noted further above, earlier TLR baseplate brackets are more angular two piece and don't have a tripod socket. That would date Jeff's TLR kit and my “New improved” kit to a similar time (the same TLR bracket is illustrated). As the TLR kit with later bracket appears in the Yashicaflex A and AS user manuals already, it must have been available in late 1954. The kits came in a number of different boxes both over time and for specific models:
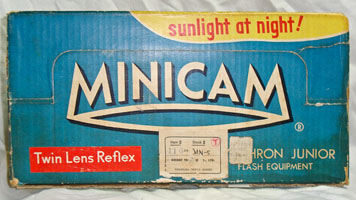
- The earliest appears to be a simpler, squarer box without internal partitioning for storage. This has blue with red panels as opposed to the later boxes with blue and yellow panels. It sometimes at least comes with a document labelled “1953 Catalog” and this displays the first type TLR bracket.
- Similar box to that shown above for the universal kit except without the “New improved” label. It sometimes at least comes with the manual/ brochure with the butterfly on the cover but it is also found with the topless lady version which is likely to be earlier - it also has the earlier TLR bracket and doesn't include the Leica M3 and New Contax models of the other brochure.
- The universal kit box shown above with the “New improved” label. When found with a manual/ brochure, it is the butterfly version.
- The TLR kit box shown just above.
- Although the various camera specific connectors and baseplates could be bought as accessories, there were also packaged kits to suit certain models, e.g., Minolta-Semi (the one seen was the squarer, older box style).
Operation
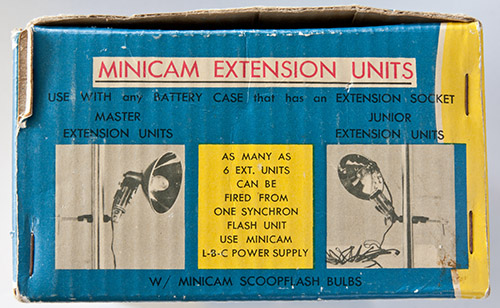
The Synchron flash units are advertised with an “LBC Power Unit”, the LBC referring to “laminated battery and capacitor”. The battery/ capacitor (condenser) power source (commonly called BC units) for flashguns generally started to appear around 1950. For the Minicam models, this comprises a laminated 22.5 volt “C” cell or “D” cell and 500 uF or 700 uF capacitors respectively. These are not mentioned as part of the kit contents (rarely found and extremely unlikely to still work) and although included with Jeff Hellige's unit, there is the question of whether they were usually included or sold as an accessory item. The box is labelled with names where items are stored such as “Bulb” and there is also a spot for “Battery” but none for “Capacitor”. One of the instructions downloadable from the net explains that the “new” Synchron Junior flash can be converted to LBC type by removing the two normal 1.5 volt “C” cells and replacing with the LBC components. As well as Jeff's box, this is also the implication on the side of my box so perhaps the LBC items were optional accessories:

It's not clear from the instructions whether the flash could fire multiple slave units if using standard batteries only but the end of my box suggests not:
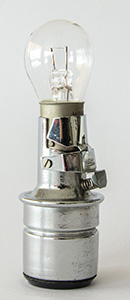
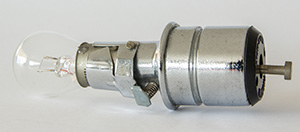
The Synchron units accommodated many types of flashbulbs. On the Junior, there was the bayonet socket in the centre of the reflector (also used for the test bulb) as well as the big socket at the top of the handle for bulbs with ES “medium” size flashbulb bases (as far as I can tell, “medium” refers to a domestic size Edison Screw light bulb base). Some of the Master reflectors didn't have the bayonet socket but adapters were available for the battery case socket to use bulbs with smaller bases. This is a Minicam unit complete with test bulb:
Other Models
I have photos of a “Minicam Flashgun Junior”. The unit is of recognisably similar design but with more basic finishes and more primitive design features generally. The packaging is a brown cardboard box with simple label with no more than its name displayed. Although there is no mention of the “Synchron” name, there do appear to be connectors allowing the connection of slaves. It seems to be the precursor to the more polished “Synchron Junior”.
Minicam made at least one type of small bulb flashgun with folding reflector (there were probably many more) but the one I have seen is not similar to any of the Yashica units. It was variously called “Pocket Flash”, “Penlite (AA battery) Pocket Flash” and “BC Pocket Flash” (battery/capacitor type instead of 3 AA batteries). It used similar 2 pin sync and extension cords to the Synchron Junior.
The company also made a number of early type electronic flash units with remote power packs one of which could be the type depicted in the Yashica C manual but there is no way to tell for sure. Models included the Speedlight 100, ST-50, TT-100 and SC-150 (at least the SC-150 also displays the “Synchron” branding). Then there were the Twinklite 35 and 60 handle type flashes, similar to but more stubby than the Honeywell Strobonars, the Ring Flash and an early “compact” type, called the Mi-Sun, with accessory handle “penlite battery converter”.
I doubt that any of these models made it beyond the early 1960s. All the markings on the flashguns were in English as was the packaging and quite a few have been for sale on US sites. Clearly, they were for export as much as domestic consumption. There also appears to be a more recent product range using “Giant” and “Super Giant” model names. These are still shoulder pack units like the earliest Minicam electronic units but some seem much more recent with some sort of LED readouts. They obviously pack a punch but are designed to be portable as well, probably for journalistic use and similar rather than on-location shoots. Whilst some of the markings on the units are in English, there are Japanese characters as well - I doubt that these were seen outside of Japan.
The Minicam Research Corporation
Very little is known about the company. With the advent of compact electronic flashguns, Minicam seemed to fade into obscurity, at least on the international scene. However, as far as I can tell, it seems to live on in some form in the same Meguro area today. I struggle with Japanese sites and Google translations but the company may actually currently exist as Mini Techno K.K., still producing strobe equipment with the “Giant” label with “Minicam” branding appearing on some models, “Mini Techno” on others and both on some. It may also be involved in other photographic accessories and maybe even munitions. The Minicam logo on the box and brochure and other items above was filed for U.S. federal trademark registration by the Japanese company on 25 October 1972. The registration date is given as 28 September 1976 and the trademark expired on 8 July 1997 but the logo still appears on what appears to be some current products. Between 1982 and 1992, the company filed for, and was granted, at least three US patents associated with flashguns.
.jpg)
.jpg)
.jpg)
 (small).jpg)
 (small).jpg)